 vigil
vigilIn the field / Device tutorials
Completing a patrol
Follow your patrol schedule and verify every checkpoint with your Vigil device.
These walkthroughs show the existing Vigil guard app. Your screens may vary by device and app version.
- Patrol Detection Alert
- Link Device to Site
- Sign In to Start
- Rest Period
- Start Patrol Alert
- Scan Beacons During Patrol
Step 1
Patrol Detection Alert
When your shift is about to start, the device will automatically alert you with a "Patrol Detected" message. Simply tap "OK" to acknowledge.
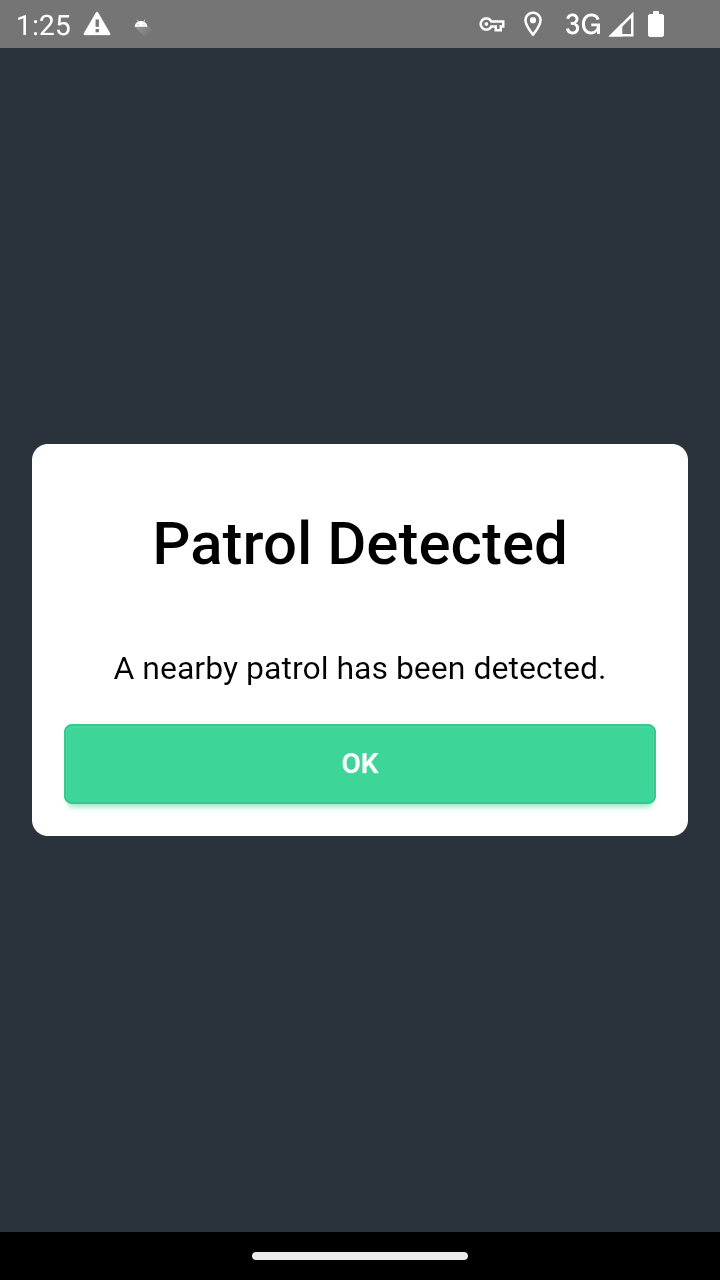
- You don't need to do anything special - the device will notify you
- Just acknowledge the alert when it appears
Step 2
Link Device to Site
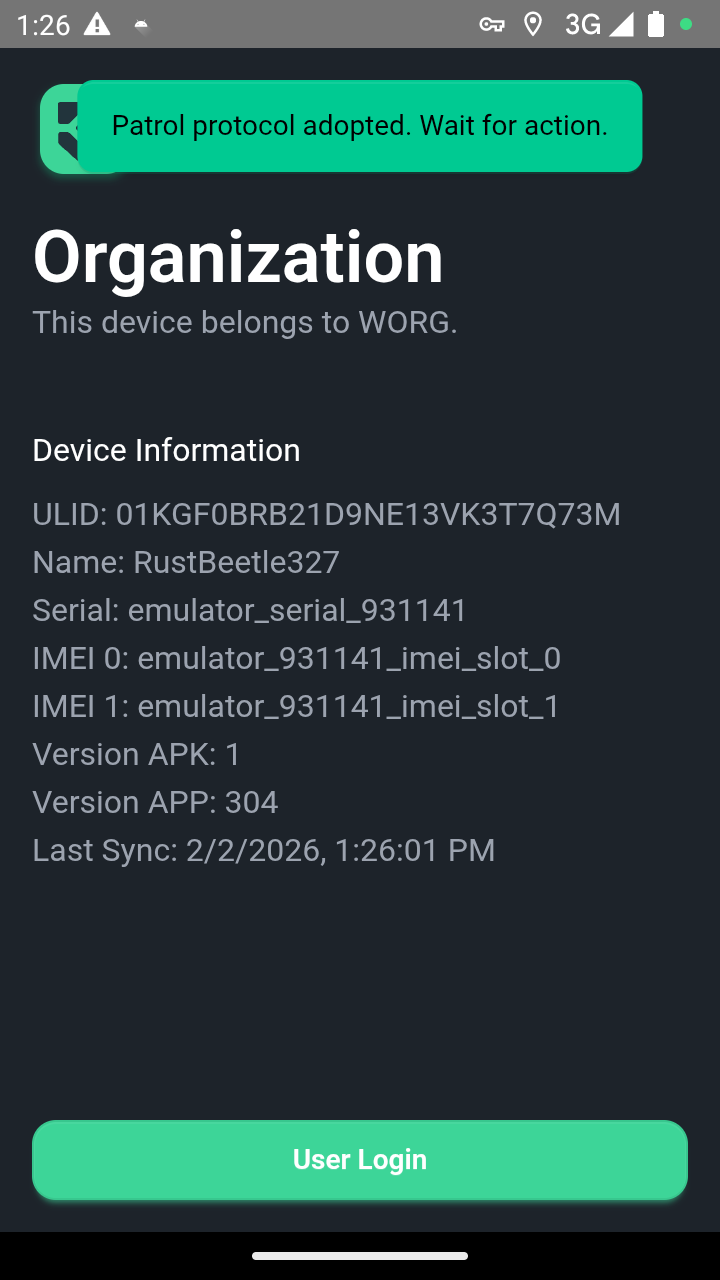
If your device is not yet linked to a site, you'll see the "Available Patrols" screen. Tap "Scan QR Beacon" and scan any beacon that belongs to your patrol route. This links your device to the site.
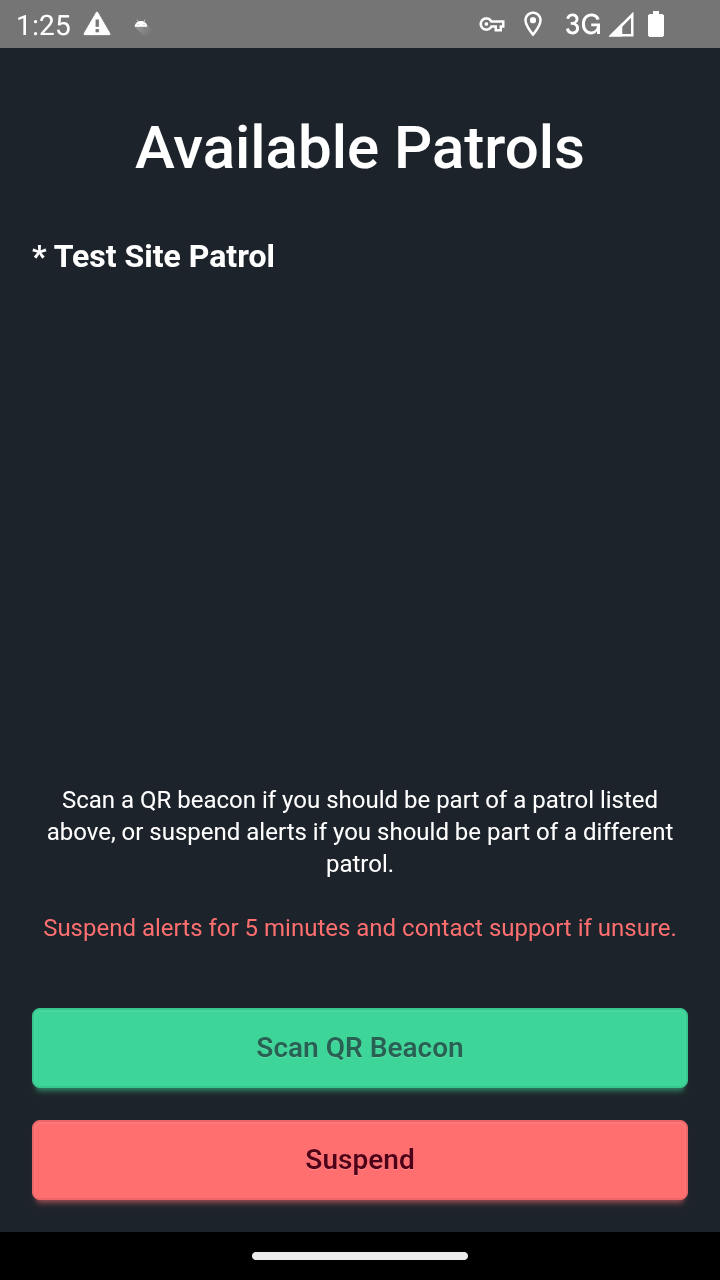
- This step only happens once per shift
- Scan any beacon that is part of your patrol route
- You'll see "Patrol protocol adopted" when successful
Step 3
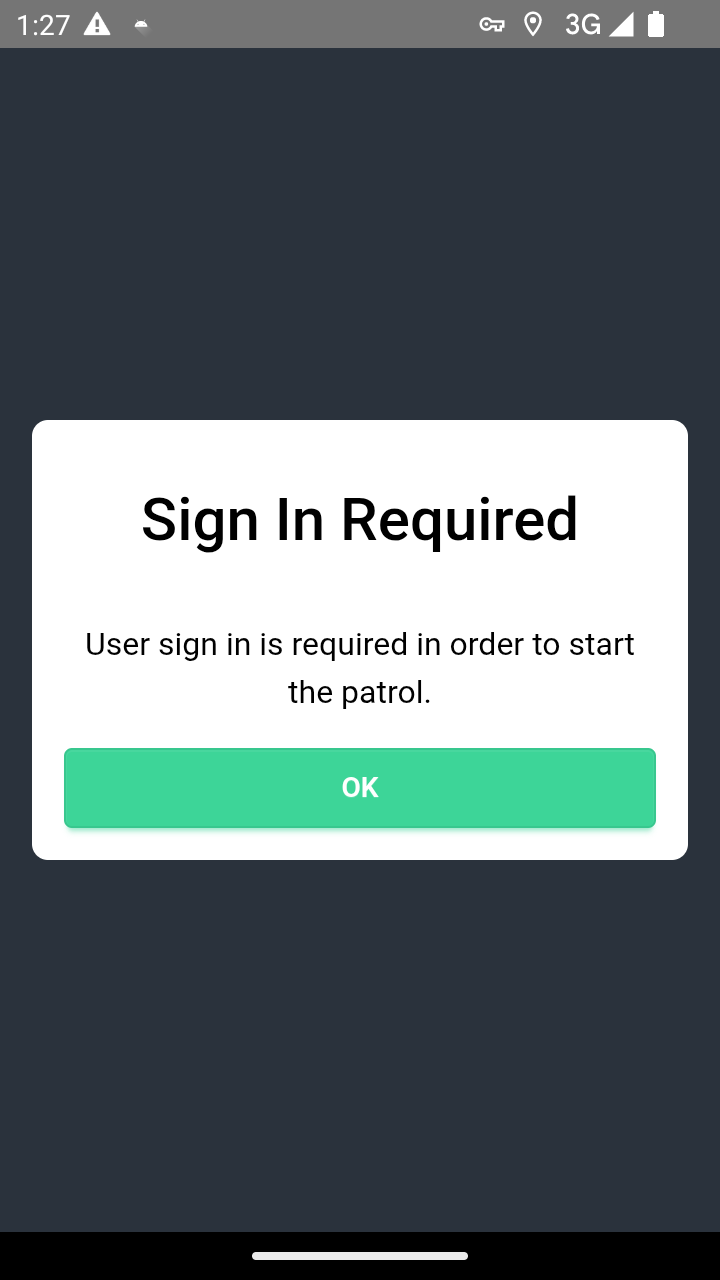
Sign In to Start
After the device is linked, you'll be prompted to sign in. Tap "OK" to proceed, then enter your ID number. If this is your first time, you'll also need to enter your first and last name.
Step 4
Rest Period
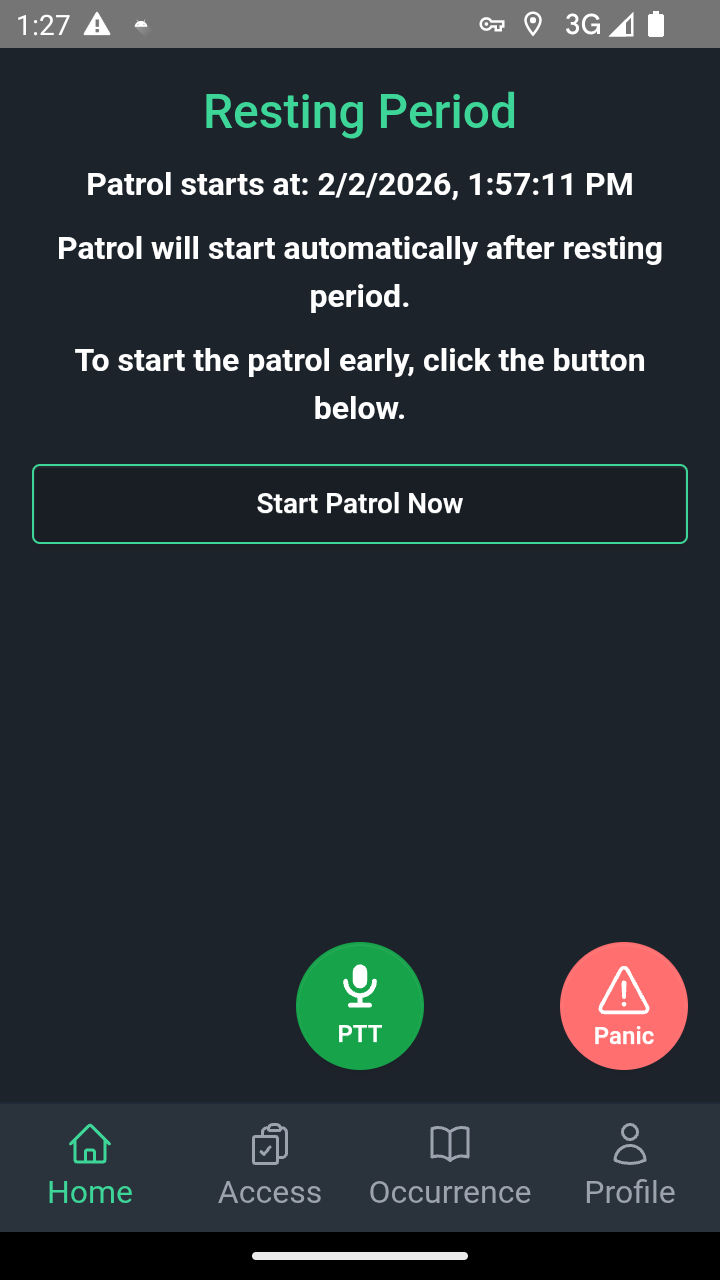
After signing in, you'll see the Resting Period screen. Each shift starts with a rest period. Wait for the device to alert you when it's time to start your patrol, or tap "Start Patrol Now" if you want to begin early.
Step 5
Start Patrol Alert
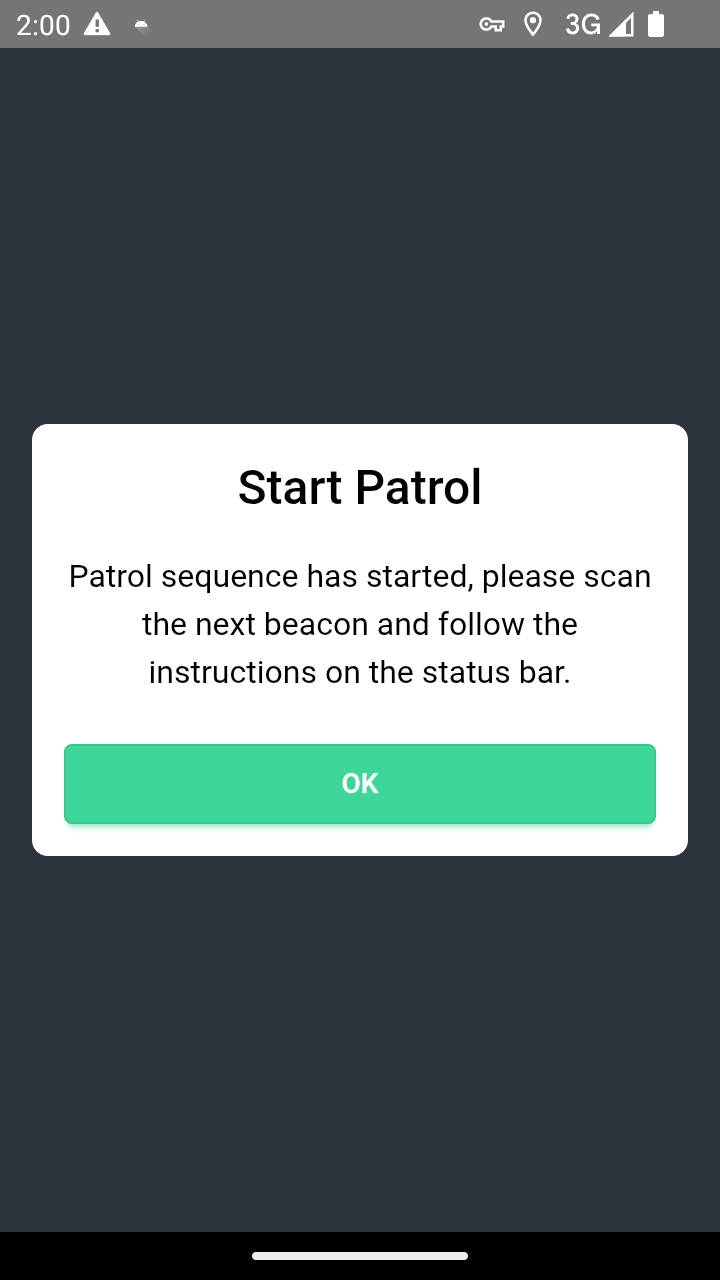
When the rest period ends, you'll receive a "Start Patrol" alert. Tap "OK" to acknowledge and begin your patrol.
Step 6
Scan Beacons During Patrol
During your patrol, you'll see a list of beacons that need to be scanned. Tap the "+" button to open the scanner, then scan each QR beacon as you walk your route. Successfully scanned beacons will show as "scanned" in green.
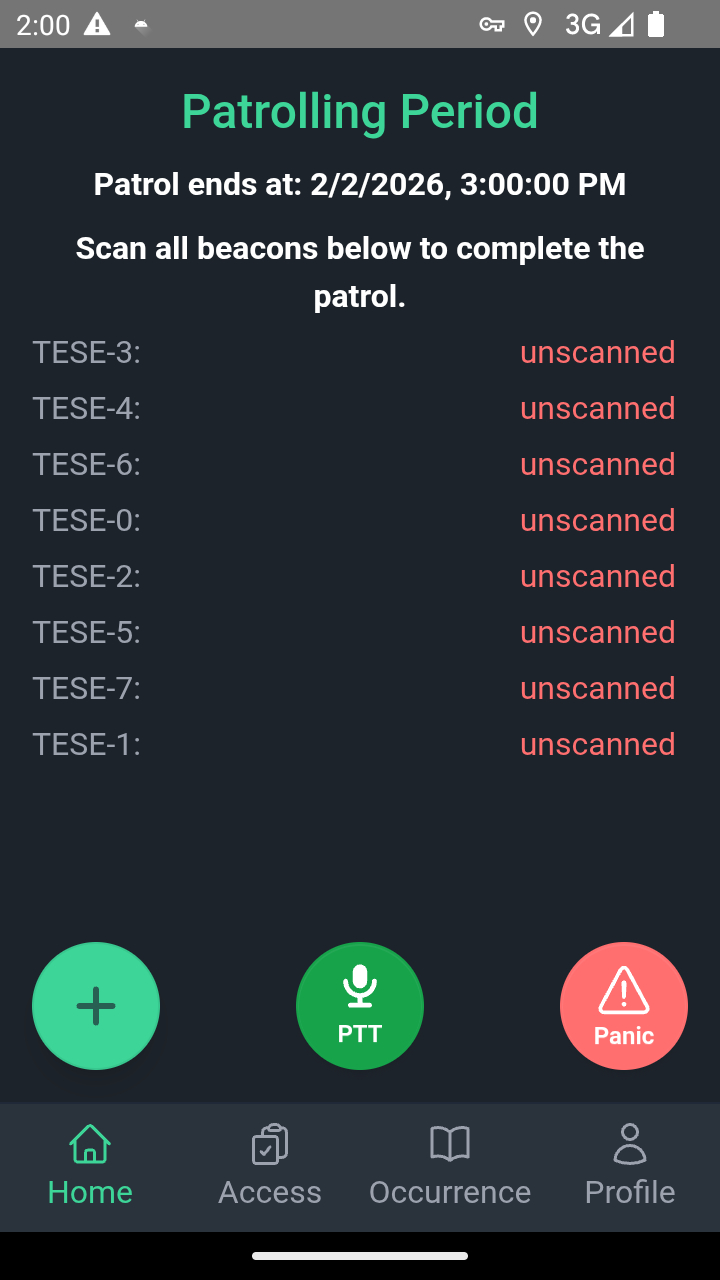
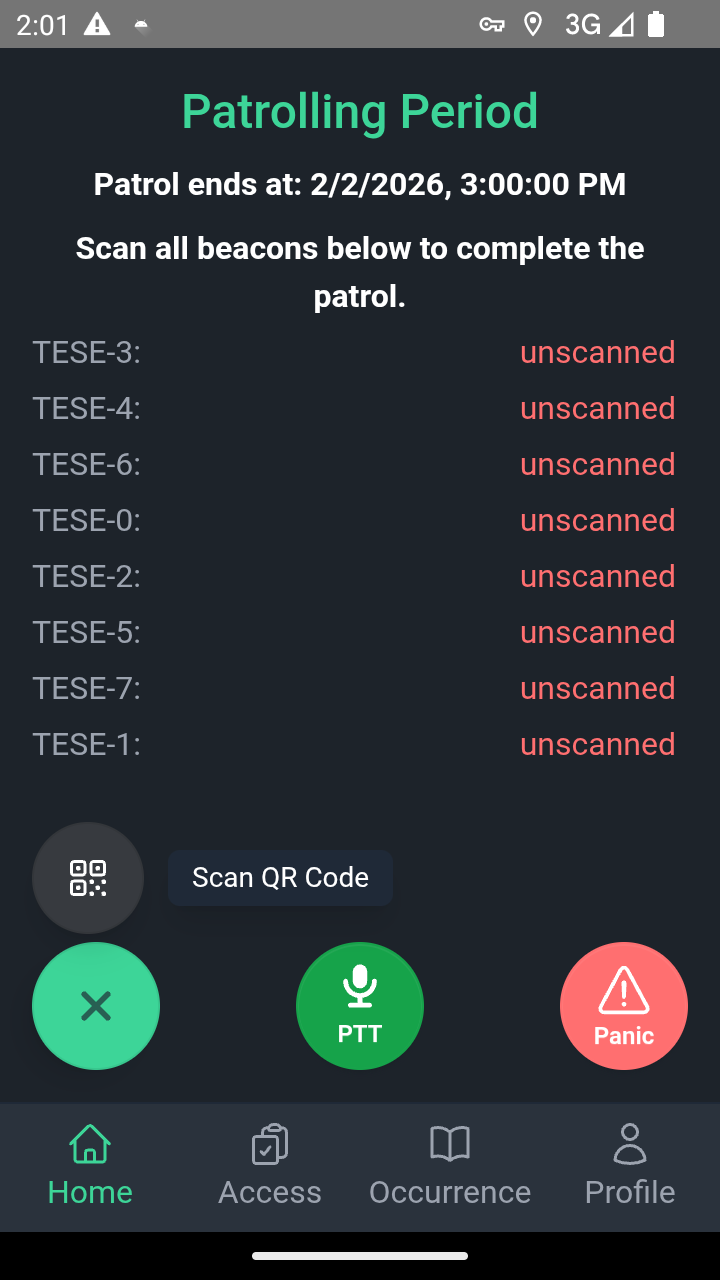
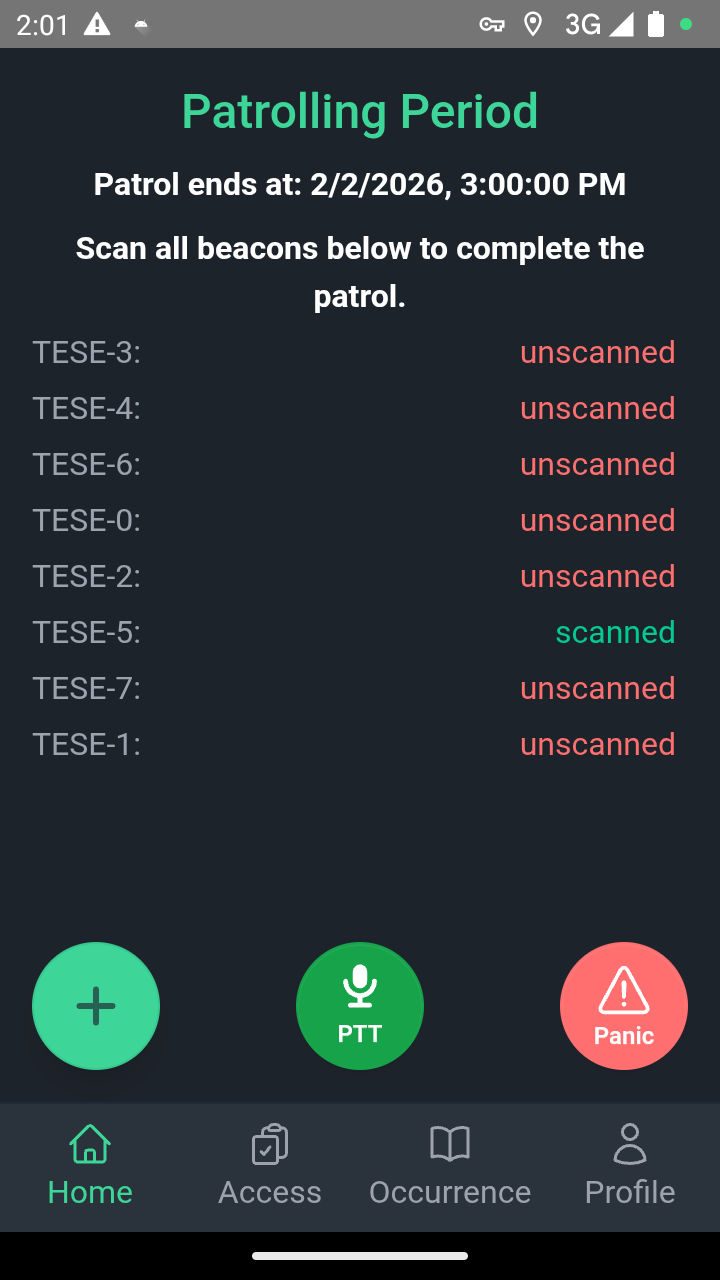
- Tap the "+" button to open the QR scanner
- Green "scanned" means successful
- Once all beacons are scanned, the rest period starts automatically